
Getting Started & Installation
Installation options, binary integrity verification, and zero-runtime execution.
Installer vs Standalone Portable
getPaint is distributed in two lightweight forms designed for maximum flexibility across modern 64-bit systems and vintage 32-bit hardware:
- Windows Setup Installer (
getPaint_Setup.exe· ~386 KB): Solid zlib-compressed ANSI NSIS installer. Configures Start Menu shortcuts, optional desktop icon, and creates a clean uninstaller in Windows Control Panel. Contains 100% pure ASCII strings to prevent font corruption (mojibake) on English or localized Windows 95/XP systems. - Portable Standalone (
getPaint.exe· ~592 KB): Zero-installation single binary. Self-contained and portable. It leaves no registry traces and runs straight from a USB thumb drive or shared network folder.
System Requirements
- Operating System: Windows 95 Gold / 98 / ME / 2000 / XP / Vista / 7 / 8 / 10 / 11 (32-bit & 64-bit), or Linux via Wine.
- Processor: Intel Pentium 90 MHz or compatible x86/x64 CPU.
- RAM: 16 MB minimum (working set is under 5 MB).
- Disk Space: Under 1 MB free space.
- Dependencies: Zero runtime dependencies. No .NET, no VC++ Redistributables, no Direct2D.
Interface & Viewport Navigation
Window components, 2-column toolbox layout, color palette, and high-power zoom navigation.
Window Components
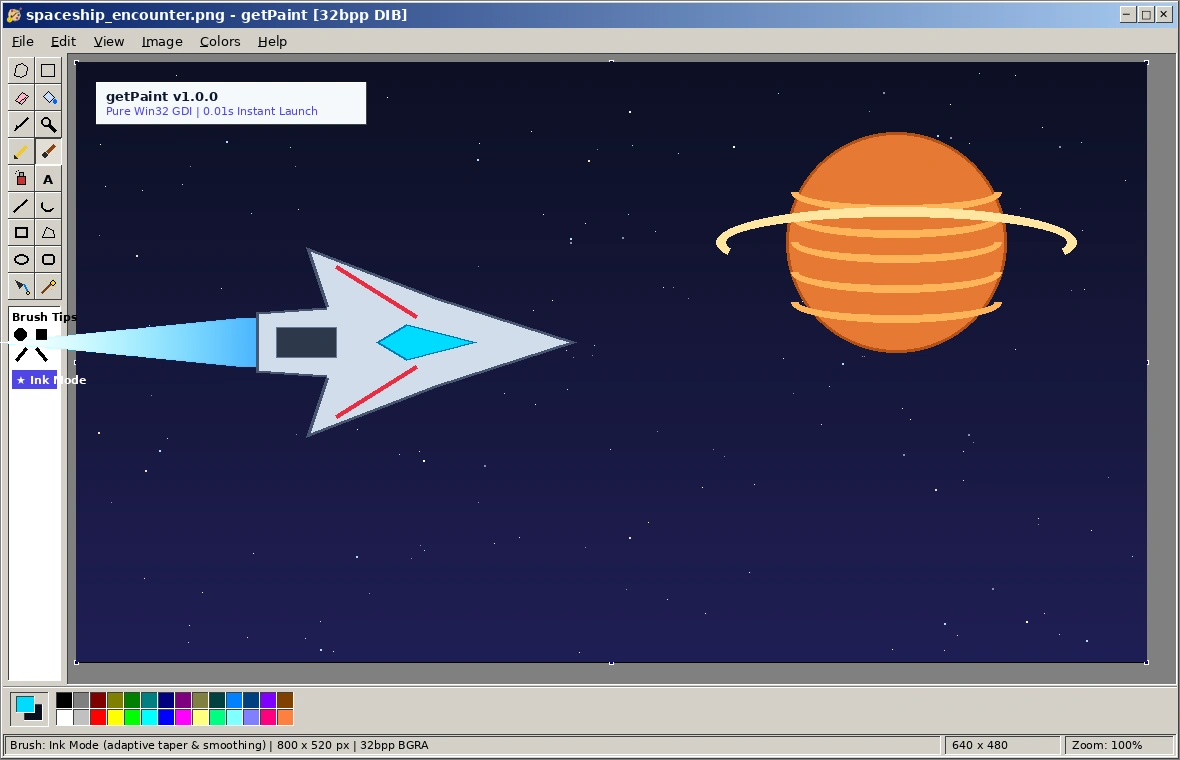
The user interface follows the classic Win32 ergonomic layout:
- Menubar: File, Edit, View, Image, Colors, and Help menus with full Alt-accelerator key routing.
- Toolbox (Left, 2 columns × 9 rows): Contains 18 drawing and selection tools. The lower pane dynamically switches between tool options (brush tips, line thickness, fill modes, tolerance, path actions, and mosaic blocks).
- Color Box (Bottom): Displays active Color 1 (Foreground / Left mouse button) and Color 2 (Background / Right mouse button) with 28 default palette swatches.
- Status Bar (Bottom): Three distinct panes displaying contextual tool instructions, mouse cursor coordinates, canvas dimensions, and active zoom level.
Zoom Ladder & Viewport Panning
Precision pixel art demands responsive viewport control without blur or interpolation artifacts:
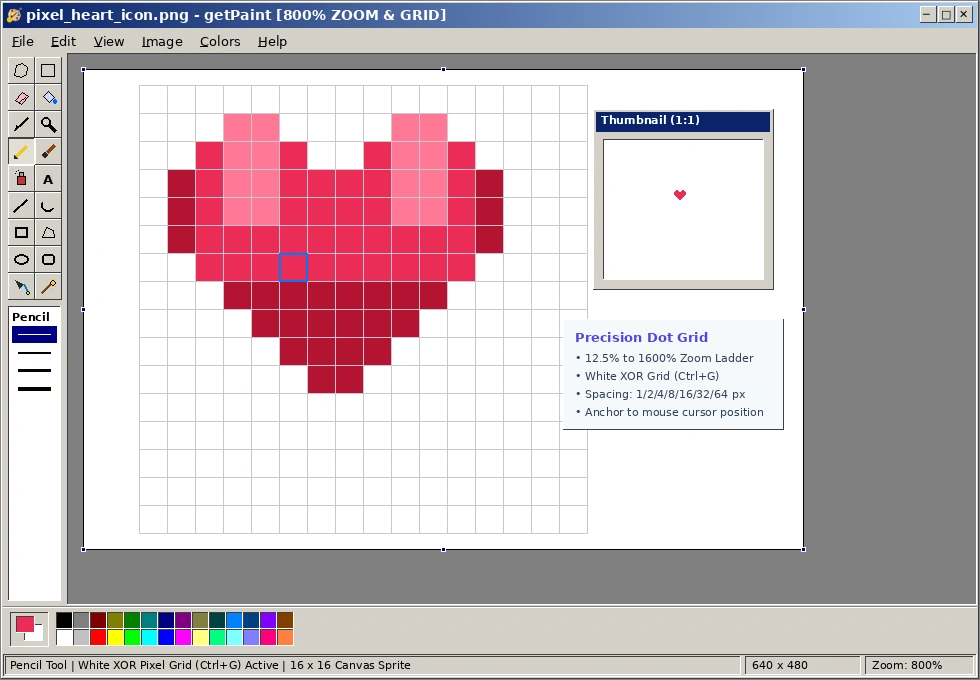
- Mouse Wheel Zoom: Hold Ctrl and scroll the mouse wheel to zoom smoothly between 12.5% and 1600%. The zoom anchors directly to the pixel under your cursor.
- Keyboard Zoom: Press Ctrl + + to zoom in, Ctrl + - to zoom out, and Ctrl + 0 to reset instantly to 100% normal size.
- Temporary Hand Pan: Hold Space and drag the mouse to pan the canvas in any direction without switching away from your current tool.
- Horizontal Scrolling: Hold Shift and scroll the mouse wheel (or use a hardware tilt wheel) for horizontal viewport scrolling.
- Pixel Grid (Ctrl + G): Toggles the white XOR pixel grid on and off. The grid renders via
R2_XORPEN, guaranteeing sharp visibility across both pitch-black and pure-white artwork. Spacing can be set to 1, 2, 4, 8, 16, 32, or 64 px viaView → Grid Spacing.
The 18 Drawing Tools Complete Reference
Comprehensive guide to all 18 tools, including pencil, brush, airbrush, flood fill, shapes, and the signature Color Eraser.
Toolbox Layout & Numbering
| Index | Tool Name | Hotkey | Sub-Options & Notes |
|---|---|---|---|
| 0 | Free-Form Select | S (or Alt+T) | Arbitrary lasso boundary with 1-bit mask and lift selection. |
| 1 | Select (Rectangular) | S | Box marquee, Ctrl+Drag stamp duplication, Opaque/Transparent modes. |
| 2 | Eraser / Color Eraser | E | Left-click: standard erase. Right-click: selective Color 1 replacement. |
| 3 | Fill With Color | G (or F) | High-speed 4-way scanline flood fill engine. Left: Color 1, Right: Color 2. |
| 4 | Pick Color (Eyedropper) | I | Left-click samples Color 1; Right-click samples Color 2. Returns to previous tool. |
| 5 | Magnifier | Z | Click to zoom in (left) or zoom out (right). Options: 1x, 2x, 6x, 8x. |
| 6 | Pencil | P | 1px Bresenham interpolation line; supports custom thickness (1~500px). |
| 7 | Brush | B | 12 classic stamp tips + modern Ink mode (speed taper and smoothing). |
| 8 | Airbrush | A | Continuous random spray particle dispersion (Small, Medium, Large). |
| 9 | Text | T | In-place multiline edit box with floating Fonts toolbar and marquee border. |
| 10 | Line | L | 1~5px width; Shift snaps to 0°, 45°, 90°; optional triangular arrowheads. |
| 11 | Curve | C | 3-point Bezier curve: Line drag → P1 control arch → P2 S-curve arch. |
| 12 | Rectangle | R | 3 fill styles (Outline only, Outline + Background, Foreground fill only). |
| 13 | Polygon | Y | Consecutive vertex clicks; double-click or click start point to close. |
| 14 | Ellipse | O | Hold Shift for perfect circle constraint; 3 fill styles. |
| 15 | Rounded Rectangle | U | 16px corner radius; 3 fill styles. |
| 16 | Pen / Path Tool | Shift+P | Photoshop-style vector Bezier paths; [Select], [Stroke], [Mosaic] actions. |
| 17 | Fuzzy Select (Magic Wand) | W | Contiguous similar color flood fill with tolerance (0, 15, 32, 64). |
Signature Color Eraser (Right-Click)
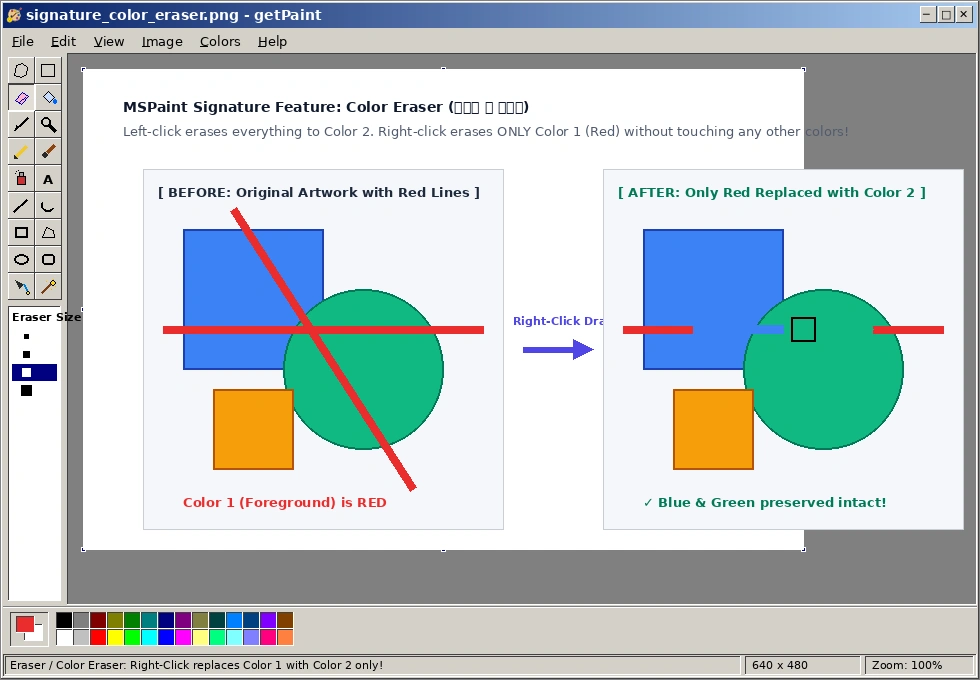
The Color Eraser is MSPaint's legendary signature feature. When dragging with the Right Mouse Button, getPaint scans every pixel within the eraser's bounding box:
- If the pixel matches Color 1 (Foreground), it is instantly replaced with Color 2 (Background).
- If the pixel does not match Color 1, it remains completely untouched.
This enables surgical line cleanup: you can sketch drafts in red or cyan, ink the final line art in black, and then right-click erase the draft lines in seconds without harming the black inks!
Selection Modes & Transparent Blit
Box selection, free-form lasso, transparent color keying, and 2-pass mask blit mechanics.
Selection Mechanics & Marching Ants
Dragging with Select (Tool 1) or Free-Form Select (Tool 0) creates an active selection marked by animated dashed marching ants marquee lines:
- Moving Selections: Drag the inside of a selection to move it. The original canvas area is automatically filled with Color 2 (Background).
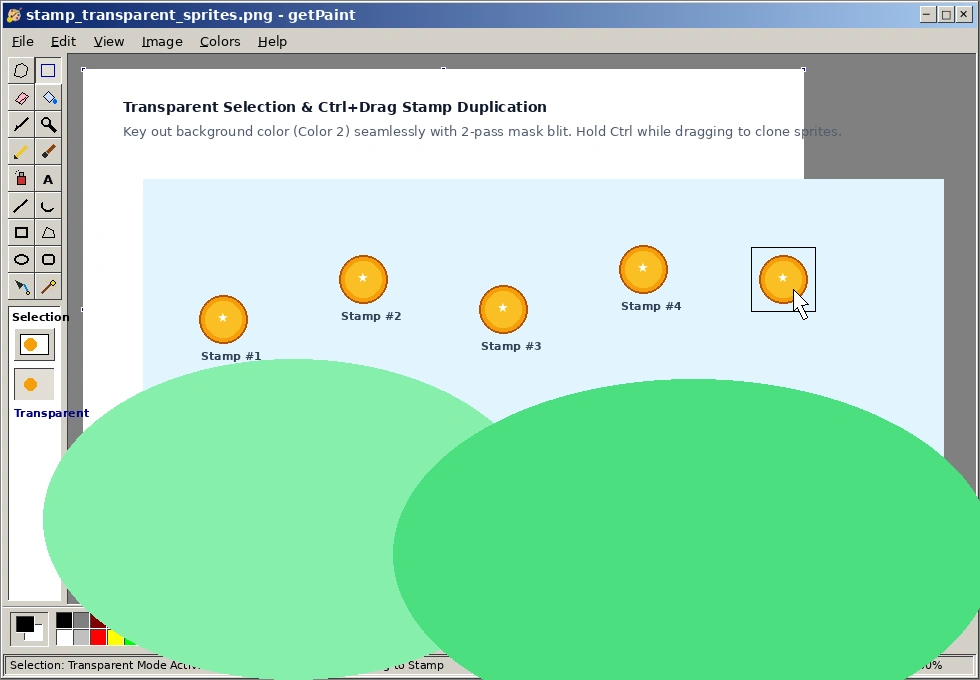
- Stamp Duplication (Ctrl + Drag): Hold Ctrl while dragging a selection to stamp copies repeatedly across the canvas.
- Cancelling Selections: Press Esc or click outside the selection box to commit it permanently into the canvas buffer.
Opaque vs. Transparent Selection Mode
The lower toolbox option pane offers two selection transparency modes (or press Ctrl+1 / Ctrl+2):
- Opaque Mode (Ctrl+1): The selection includes its solid background rectangular pixels when moved or stamped.
- Transparent Mode (Ctrl+2): Any pixel within the selection that exactly matches Color 2 is treated as completely transparent. This allows clean character sprite composition without square background blocks.
Win95 2-Pass Mask Blit Engineering
TransparentBlt was introduced in Windows 98. On Windows 95 Gold, msimg32.dll does not exist. getPaint dynamically detects whether msimg32.dll is present; if missing, it automatically falls back to an atomic 2-pass monochrome mask blit using SRCAND and SRCPAINT raster operations. This guarantees zero crashes and identical visual output on vintage Windows 95 machines!
Advanced Selection: Magic Wand & Pen Tool
GIMP-style fuzzy selection with tolerance presets, and Photoshop-style Bezier anchor points with tangent handles.
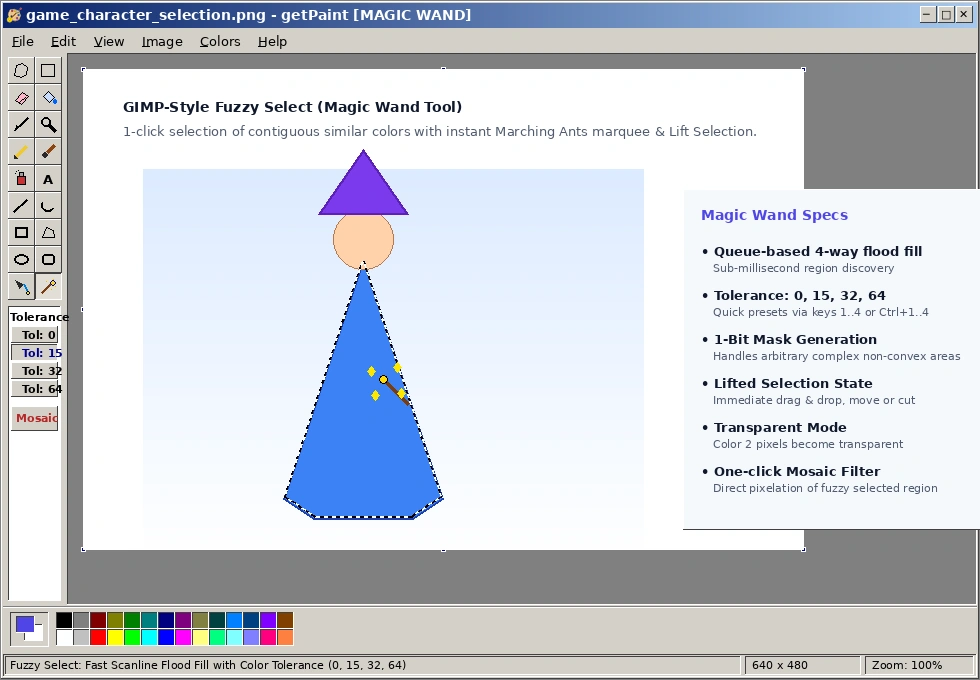
GIMP-Style Fuzzy Select (Magic Wand · Key W)
The Magic Wand tool enables 1-click contiguous color segmentation. Powered by an ultra-fast queue-based 4-way scanline flood fill engine, it evaluates Euclidean RGB distance against the selected tolerance threshold:
- Tolerance 0 (1 or Ctrl+1): Selects only pixels that match the target RGB value with 100% precision. Ideal for crisp pixel art flat fills.
- Tolerance 15 (2 or Ctrl+2): The default setting. Accommodates subtle compression artifacts and anti-aliasing fringes.
- Tolerance 32 (3 or Ctrl+3): Selects moderate gradients, shading, and textured regions.
- Tolerance 64 (4 or Ctrl+4): Selects wide gradient expanses and complex organic tones.
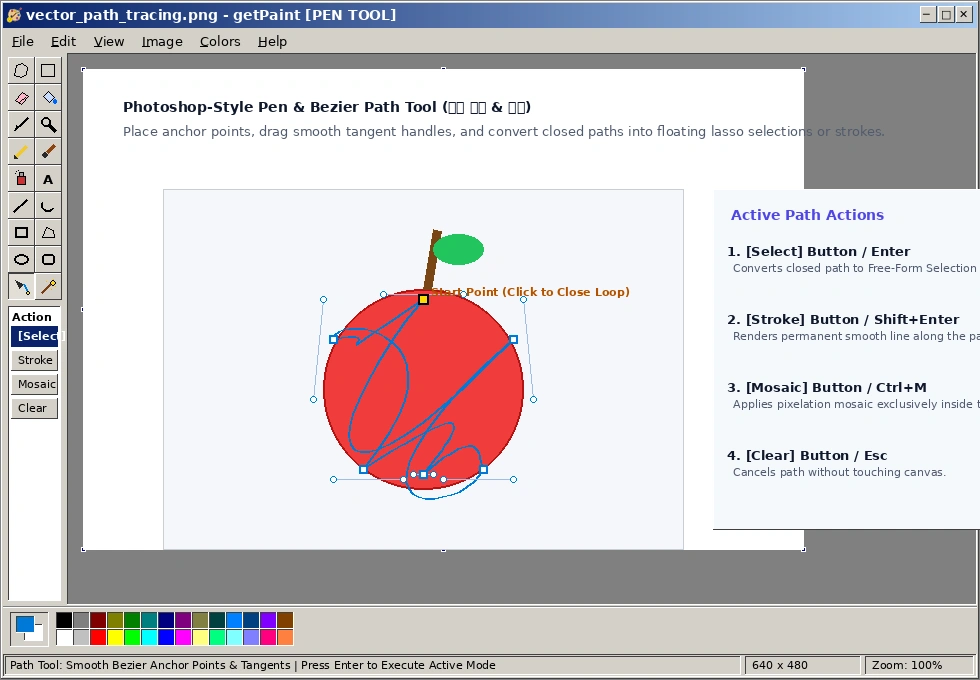
Photoshop-Style Pen / Path Tool (Shift+P or P)
Author precision vector paths directly in getPaint:
- Adding Anchor Points: Left-click to place a sharp corner anchor point. Drag while clicking to extend smooth Bezier tangent control handles.
- Closing the Loop: Click near the yellow highlighted starting anchor point (within 7 px) to close the path into a complete vector loop.
- [Select] Action (Enter): Converts the closed Bezier curve into a Free-Form Selection with a GDI winding region mask, ready to move or stamp.
- [Stroke] Action (Shift+Enter): Renders silky 32-step interpolated curves using the active line width and Color 1.
- [Mosaic] Action (Ctrl+M): Applies pixelation mosaic exclusively inside the closed Bezier loop.
- Undo Anchor (Backspace / Delete): Removes the most recently placed anchor point.
Mosaic Pixelation Filter & Custom Thickness
One-click privacy pixelation filter, and numeric thickness controls up to 500 px.
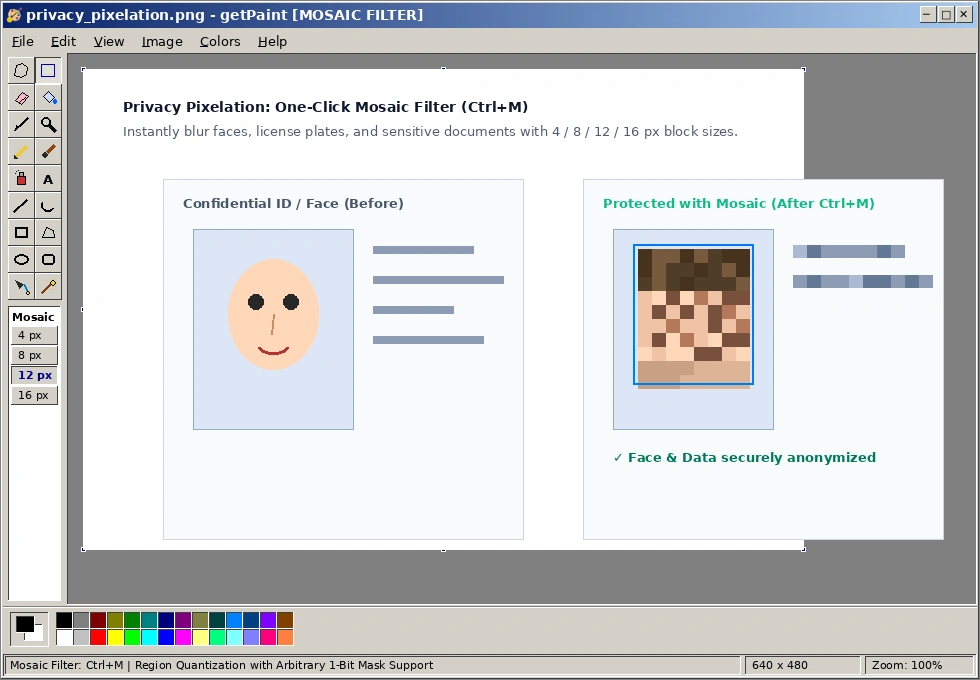
One-Click Region & Path Mosaic (Ctrl+M)
Protect confidential information and censor sensitive images without cumbersome multi-step filter chains. getPaint features an integrated region quantization engine:
- Instant Execution: Select any region (via Box Select, Free-Form Lasso, Magic Wand, or Pen Loop) and press Ctrl+M.
- Block Size Presets: Choose 4 px, 8 px, 12 px, or 16 px blocks from the toolbox option box.
- Custom Block Size: If no selection is active, pressing Ctrl+M opens the Mosaic Dialog, allowing any custom block size between 2 and 64 px.
- 1-Bit Mask Support: Only pixels strictly within non-convex lasso or Bezier curves are quantized; external artwork is left untouched.
Dynamic 1~500px Thickness Control ([ / ])
Classic MSPaint restricted tools to 4 fixed sizes. getPaint breaks free with full custom radius control:
- Bracket Keys: Press [ to decrease thickness by 1 px, or ] to increase thickness by 1 px. Hold Shift to jump by 5 px.
- Custom Thickness Dialog (Ctrl+Shift+W): Enter any integer thickness between 1 and 500 px. Features one-touch quick preset buttons (1, 2, 5, 10, 20, 35, 50, 100 px).
- Scope Selection: Apply the custom thickness to the currently active tool only, or batch-apply to all drawing tools (Pencil, Brush, Line, Curve, Shapes).
- Toolbox Focus Indicator: When an oversized custom thickness is active, the toolbox displays an explicit
[ 25px ]indicator.
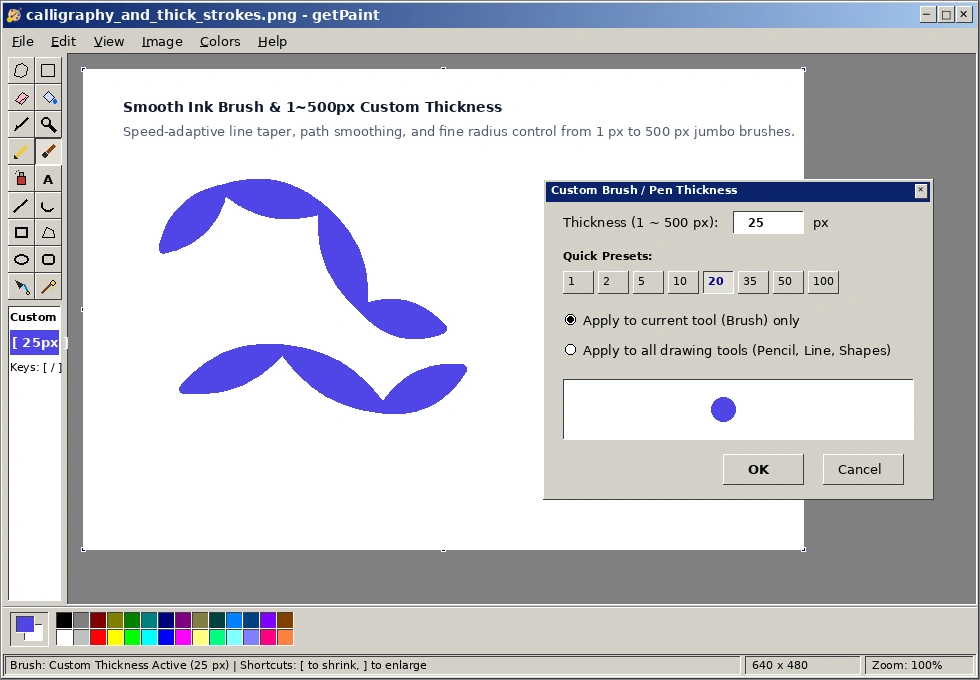
Image Transformations & Palette Operations
Lossless GDI transformations, color inversions, 28-color palette swatches, and custom RGB mixing.
Image Transformations
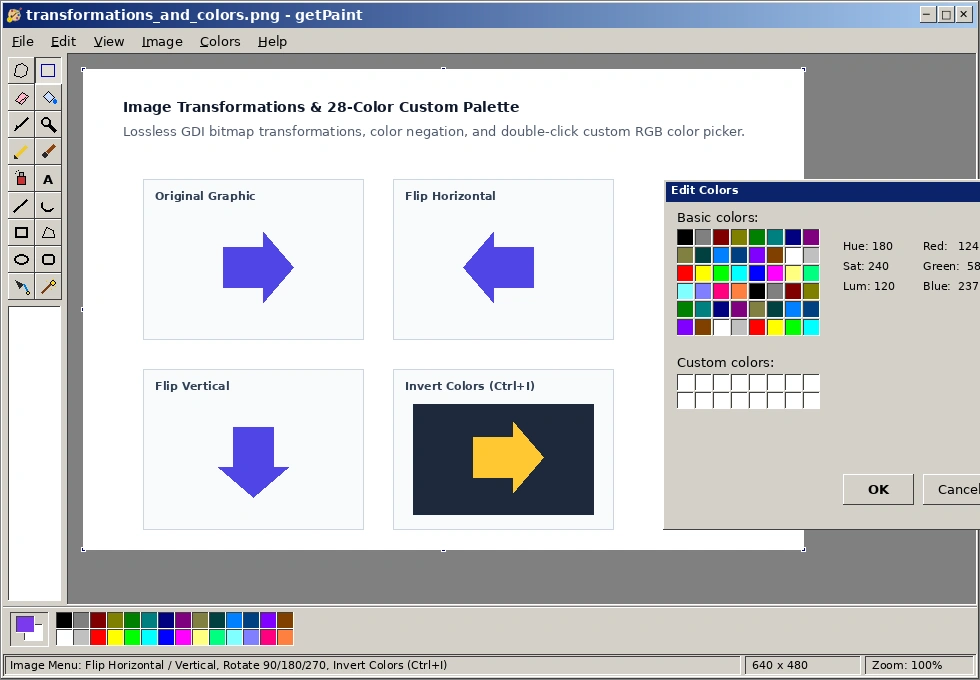
- Flip / Rotate (Ctrl + R): Opens the Flip and Rotate dialog. Options include: Flip Horizontal, Flip Vertical, and Rotate 90°, 180°, or 270°. Operates on active selections or the entire canvas.
- Stretch / Skew (Ctrl + W): Stretch horizontally or vertically by percentage, or skew angles up to ±89°.
- Invert Colors (Ctrl + I): Inverts RGB values (
255 - R,255 - G,255 - B) across the selection or canvas. - Attributes (Ctrl + E): Change canvas width, height, and unit measurements (Pixels, Inches, Centimeters).
28-Color Palette & Custom Color Editing
The bottom palette displays 2 rows of 14 standard colors. Left-clicking a swatch assigns Color 1; right-clicking assigns Color 2.
Double-clicking any swatch opens the Edit Colors dialog, where you can mix custom RGB / HSL colors and save them into the custom palette rack.
Keyboard Shortcuts & Navigation Reference
Complete cheat sheet of all drawing, editing, viewport navigation, and tool option shortcuts.
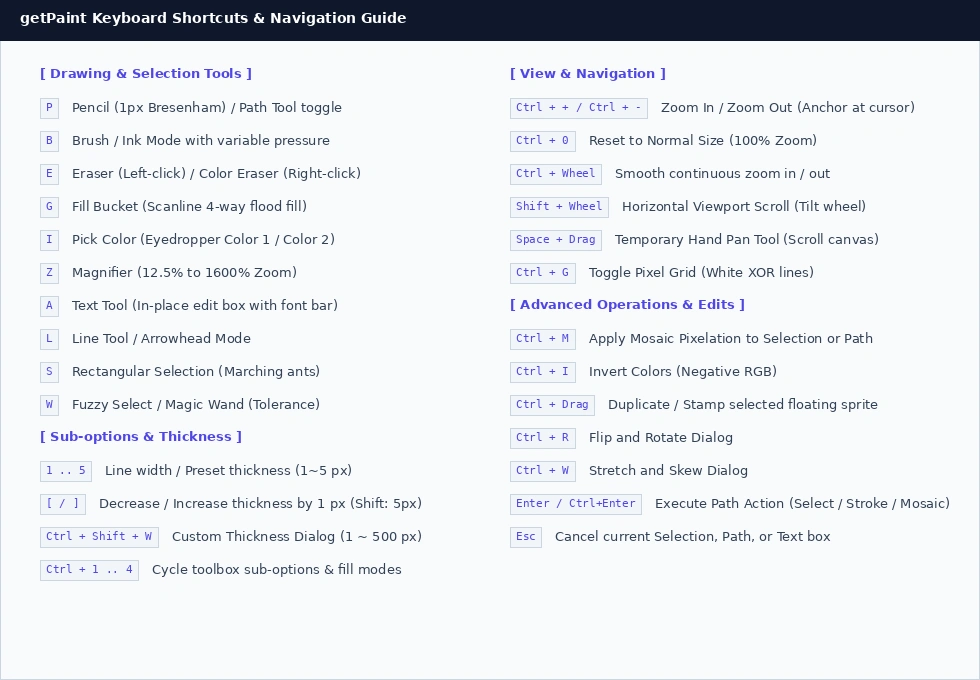
| Category | Shortcut | Action & Description |
|---|---|---|
| Tools | P | Toggle Pencil (1px Bresenham) / Path Tool |
| Tools | B | Brush (Toggle classic stamp tips & Ink mode) |
| Tools | E | Eraser (Left: erase, Right: selective Color 1 replacement) |
| Tools | G / F | Fill Bucket (Scanline 4-way flood fill) |
| Tools | I | Pick Color (Eyedropper Color 1 / Color 2) |
| Tools | Z | Magnifier (Toggle zoom lens) |
| Tools | A / T | Text Tool (In-place edit box with font bar) |
| Tools | L | Line Tool / Arrowhead mode |
| Tools | S | Rectangular Selection (Marching ants) |
| Tools | W | Fuzzy Select / Magic Wand (Tolerance presets) |
| Tools | Shift + P | Photoshop-style Pen / Path Tool |
| Thickness | 1 .. 5 | Select Line width presets (1 to 5 px) |
| Thickness | [ / ] | Decrease / Increase thickness by 1 px (Shift: 5 px) |
| Thickness | Ctrl + Shift + W | Open Custom Thickness Dialog (1 ~ 500 px) |
| Sub-options | Ctrl + 1 .. 4 | Cycle toolbox sub-options & fill modes |
| Navigation | Ctrl + Wheel | Smooth continuous zoom in / out (cursor anchored) |
| Navigation | Ctrl + 0 | Reset to Normal Size (100% Zoom) |
| Navigation | Ctrl + + / Ctrl + - | Stepwise Zoom In / Zoom Out |
| Navigation | Shift + Wheel | Horizontal Viewport Scroll (Tilt Wheel) |
| Navigation | Space + Drag | Temporary Hand Pan Tool (Scroll canvas) |
| View | Ctrl + G | Toggle White XOR Pixel Grid |
| Filter | Ctrl + M | Apply Mosaic Pixelation to Selection or Path |
| Image | Ctrl + I | Invert Colors (Negative RGB) |
| Image | Ctrl + R | Flip and Rotate Dialog |
| Image | Ctrl + W | Stretch and Skew Dialog |
| Selection | Ctrl + Drag | Duplicate / Stamp selected floating sprite |
| Path | Enter | Execute Active Path Action (Select / Stroke / Mosaic) |
| Path | Shift + Enter | Execute Stroke Path directly |
| General | Ctrl + Z / Ctrl + Y | Atomic Undo / Redo |
| General | Esc | Cancel active selection, path, or text edit box |
Win95 GDI Architecture & Technical Notes
In-depth architectural analysis of 32bpp DIB Section rendering, PE symbol stubbing, and memory bounds.
32bpp DIB Section Pipeline (g_canvasBits)
Unlike modern graphics suites that bundle Chromium or multi-megabyte Skia/Direct2D engines, getPaint executes directly against the Windows GDI substrate:
- Memory Layout: The canvas is maintained in a 32bpp BGRA bottom-up DIB Section (
CreateDIBSection). Memory access is direct through a flat pointerg_canvasBits. - Flicker-Free Double Buffering: All drawing operations, grid overlays, rubber-band guides, and marching ants marquee outlines are composited into an offscreen memory DC (
hdcMem) before performing a single atomicBitBltto the screen. - Viewport Bounds Clipping: Zoom and scroll coordinates are dynamically clipped. In high-zoom modes, getPaint blits only the subset of pixels visible in the current viewport, ensuring high performance even with large images.
Assembly-Level Vista+ Symbol Hooking
Standard MinGW/GCC runtimes introduce static references to Vista+ threading symbols like GetThreadId and ConditionVariable primitives. In getPaint, these symbols are intercepted at compile time:
- Dummy stubs (
Win95_GetThreadId,Win95_InitCV) are declared and redirected using GCC's__asm__("__imp__...")attribute. - This eliminates Vista+ symbols from
KERNEL32.dll's Import Address Table (IAT), verified throughobjdump -p. - Dynamic loading via
LoadLibraryAis employed for optional libraries (gdiplus.dll,wininet.dll,msimg32.dll), preserving compatibility with base Windows 95 installations.
Infinite Recursion Protection in Viewport Scrolling
In Win32 child window hierarchies, mouse wheel messages can trigger cascading loops if forwarded via DefWindowProc. getPaint's canvas window procedure (CanvasWndProc) intercepts and consumes WM_MOUSEWHEEL by returning 0 immediately, preventing circular event bubbles to the main frame.